6 Things You Didn’t Know About Device Magic Mobile Forms
Device Magic is more than just a mobile forms app, it’s a complete data collection solution. There are tons of features in the Dashboard that you may not have discovered. These features can quickly add additional customization options and enhance your workflows.
Check out this list of six top features and how to use them so you can make the most of Device Magic.
Download the 6 Things You Didn’t Know eBook
1. Create Groups for Mobile Forms and Devices
Groups are a way to organize your forms and devices and help you manage what users see in their mobile forms app. This feature is ideal for users that only need access to specific forms. For example, when you want to separate your sales team and your technicians’ forms.
You can set up Groups in the Settings tab of your Dashboard. From there, you can add a new group as well as assign devices and forms to a group.
After you build a form, you can share it across all of the devices associated with your account. Or, you can make the form available for only the specific devices or users you choose.
2. Manage User Roles and Permissions
Similar to Groups, you can also create and assign roles to your users. Users are not the same thing as devices. Anyone who is a user will have access to your Device Magic Dashboard. Each role you create for users will have specific permissions for your account.
For example, if you wanted your manager to be able to add forms or update billing information and you don’t want your dispatcher to have that ability, you can set the user permissions accordingly.
You can manage users and roles under the Settings tab in the Dashboard sidebar. Here you’ll see a list of all current users and their role. You can also create new roles and choose the permissions for that role, such as giving it access to certain forms, the ability to create, update or delete forms, read only access, and other settings for your account.
After a role has been created, you can go back and assign it to the appropriate users, or update a user’s current role.
3. Setting Destination Rules for Forms Automation
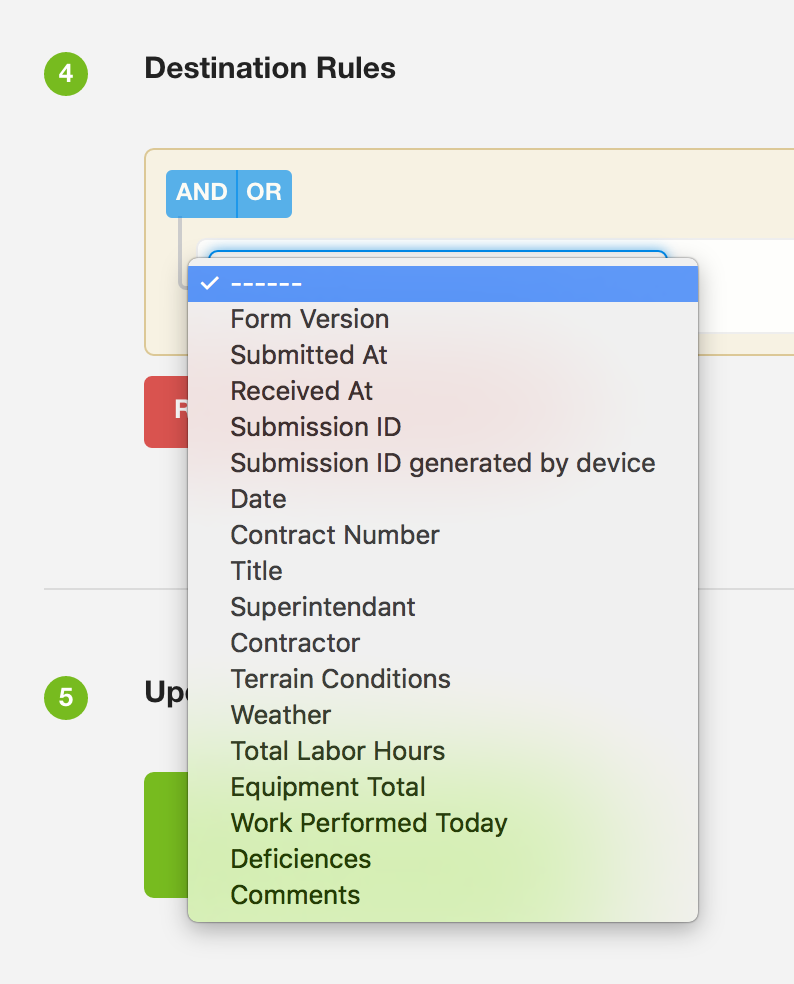
Destination Rules allow you to set conditions for Destinations based on the data that is collected in a form. So data can be delivered automatically to the chosen Destination when certain conditions are met.
Let’s say your field representative is having a customer fill in their information on an invoice form. If that customer needs to supply an email address, you can set a rule so that once the form has been submitted they will automatically receive an invoice to their email address. However, if an email address was not provided, no email would be sent.
Destination Rules are completely customizable to your specific needs, and can be set up while creating or updating a Destination. Choose the option and conditions required for your rule. Then you can set up any additional rules if needed, or finish creating or updating your Destination.
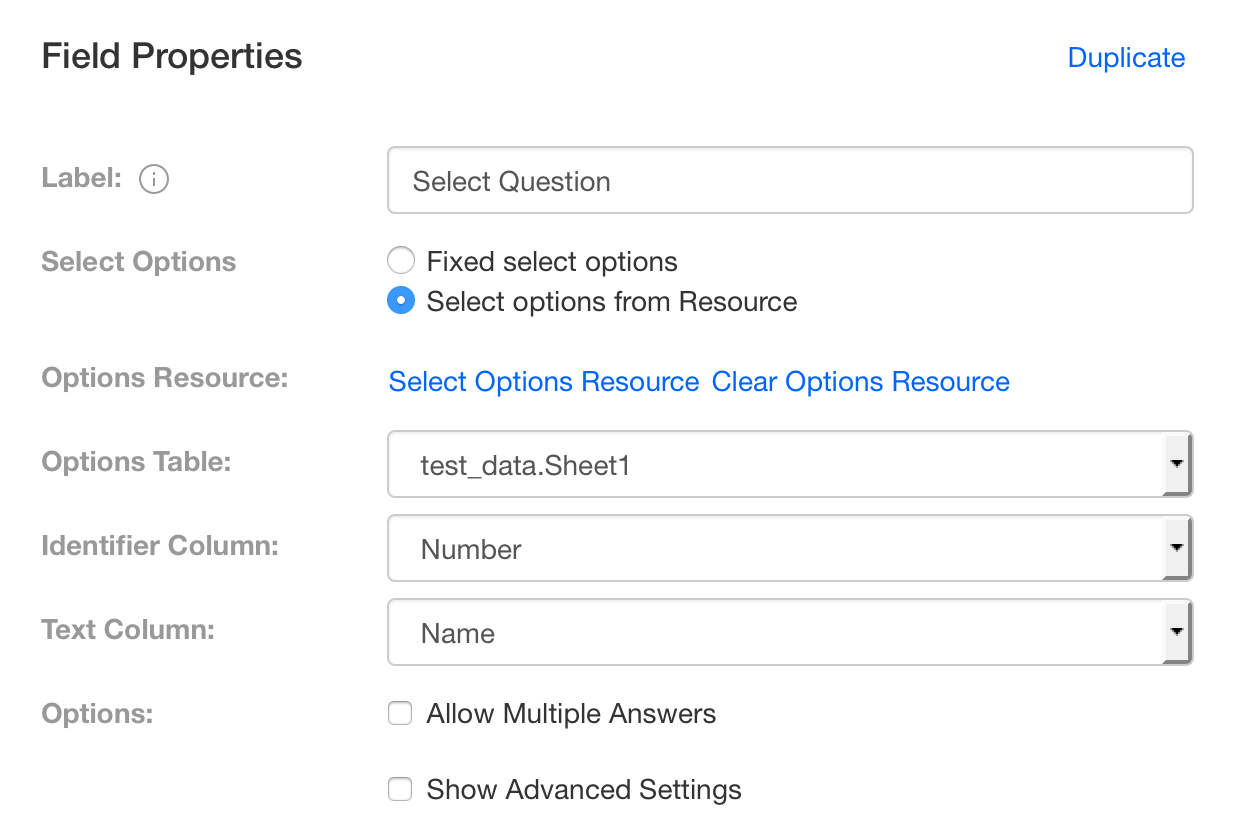
4. Select List Options from a Resource
 Resources are files you can upload into your Device Magic account to reference and utilize during the Form Building process.
A great way to use Resources is with select list questions in your forms. This would allow you to upload a list of email addresses as an Excel file to use as answer choices for a select question in a form, for example.
Your Resource can be attached to a select question while building your form in the form builder. In the field properties for the select question, you’ll see the option to “Select options from a Resource,” then you can choose or upload the file you want to attach and customize what the user will see in the mobile forms app.
This allows you to simplify the form completion process for your users and ensure consistent answer format. Instead of users typing in the answers to the question, they can quickly choose the correct answer from the list provided through your Resource.
5. Dispatch & Workflow Automation
Dispatch is a feature that allows you to send a form with pre-populated data, such as a job location or other key details, to a team member’s device.
Instead of a tech needing to come to the office to pick up paperwork for a new assignment, or calling to give them details, a notification with the necessary information can be sent directly to their mobile device through Dispatch. The tech can finish filling out the form after they complete the job.
You can also use Dispatch to set up a workflow that will transfer previously captured data to be used in a new submission and can be delivered to several Destinations. A Dispatch workflow will automate the collection and distribution of your data by sending a form to the next person in a process so they can fill out their information before submitting to a final Destination.
For example, a technician may fill out a form after completing an installation for a customer. The form they submit could be sent to a manager for approval and signature before being sent to the accounting department as a final destination. You can automate this process with a Dispatch workflow.
6. Create Custom PDFs
With the PDF Destination, you can export your mobile forms and send them to a recipient as a customized PDF. When you set up a new PDF Destination, you can upload your own template to customize how the PDF will look when it is delivered, including branding for your company.
You can make your PDF resemble your original paper form, or create a new layout. Decide the order of questions on the PDF, define image sizes, and even choose font size and color.
Watch this video for instructions on how to set up your customized PDF.
[Download the “6 Things you Didn’t Know you Could Do with Device Magic” eBook]
Ready to test mobile forms in the field? Reach out to one of our experts.